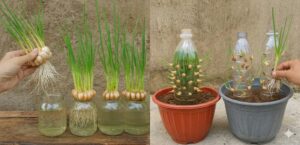
Garlic is a staple in almost every kitchen, prized for its flavor and incredible health benefits. But did you know you can stop adding it to your grocery list? Growing your own garlic at home is surprisingly simple, even if you don’t have a large garden. With a little patience, you can have a fresh, organic supply all year round! 🌿✨
🍃 Why Grow Your Own Garlic?
Store-bought garlic is often treated to prevent sprouting and can travel thousands of miles to reach your plate. Homegrown garlic is fresher, more potent, and free from chemical inhibitors. Plus, you can grow unique varieties that you’ll never find in a supermarket! 🧄💪
🧪 Getting Started: The “Seed”
You don’t need seeds to grow garlic—you just need a bulb:
- The Selection: Choose a large, healthy organic garlic bulb. Break it into individual cloves, but keep the papery skin on each clove. 🧄
- The Best Cloves: Always plant the largest cloves from the outside of the bulb; they will produce the biggest new heads of garlic.
🪴 Planting: In Pots or the Ground
Garlic is very versatile and can thrive in garden beds or containers on a balcony.
🥣 How to Plant
- Soil: Use well-draining soil rich in organic matter. Garlic hates “soggy feet,” which can cause the bulbs to rot. 🏺
- Depth and Spacing: Plant each clove pointed-end up, about 5 cm deep. If planting in a row, space them 10–15 cm apart. 📏
- Timing: Traditionally, garlic is planted in the fall for a summer harvest, as it needs a period of cold (vernalization) to form a bulb. However, you can also grow “garlic greens” on a windowsill any time of year! ❄️🌱
💧 Maintenance and Care
- Light: Garlic loves the sun! Ensure it gets at least 6 hours of direct sunlight per day. ☀️
- Watering: Water regularly to keep the soil moist, but reduce watering once the leaves start to turn yellow.
- The Scapes: In late spring, some varieties grow a curly flower stalk called a “scape.” Cut these off so the plant focuses its energy on the bulb (and eat them—they are delicious in stir-fries!). ✂️🥗
🧺 Harvesting and Storage
- The Sign: When the bottom 2-3 leaves turn brown, it’s time to harvest! 🍂
- The Process: Carefully dig up the bulbs and let them dry (cure) in a shaded, well-ventilated area for 2–3 weeks. 🌬️
- The Cycle: Save your biggest and best bulbs to replant in the next season. This is how you create an infinite supply! ♻️🧄
Leave a Reply