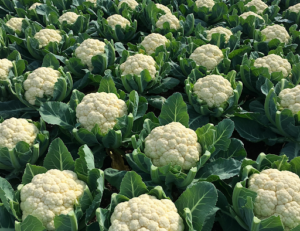
Cauliflower (Brassica oleracea var. botrytis) is often considered a challenging vegetable for home gardeners, but with the right timing and a few simple techniques, even a beginner can produce impressive, restaurant-quality heads. 🥦 Known for its versatility in the kitchen and its high nutritional value, cauliflower is a cool-season crop that rewards patience and consistent care. This guide breaks down the process from seed to table, ensuring your first harvest is a success. 🥗✨
Understanding the Basics: Timing and Soil 📝
The most critical factor in growing cauliflower is the temperature. Unlike tomatoes or peppers, cauliflower thrives when the weather is mild. 🌡️
- The Cool-Season Window: Cauliflower should reach maturity during the cool parts of the year—either late spring before the summer heat hits, or mid-autumn before the first hard freeze. If it gets too hot, the plant may “bolt” or produce small, grainy heads (buttoning). 📉❄️
- Soil Preparation: Cauliflower is a “heavy feeder.” It requires deep, fertile soil rich in organic matter. Before planting, mix in plenty of well-rotted compost or manure. The soil should be well-draining but capable of holding moisture, with a pH between 6.0 and 7.0. 🏺🧪
- The Nitrogen Requirement: Because the plant needs to grow large, lush leaves to support the developing head (the “curd”), it requires a steady supply of nitrogen throughout its life cycle. 🌿💪
Planting and Spacing 🛠️
Whether starting from seeds or buying seedlings from a nursery, proper spacing is vital for airflow and nutrient access.
- Starting Seeds: Start seeds indoors about 4 to 6 weeks before your last frost date. Transplant them outside when they have at least 4 or 5 true leaves. 🏠🌱
- Transplanting: Plant seedlings slightly deeper than they were in their containers. Space plants 45 to 60 cm apart in rows. This prevents competition for nutrients and reduces the risk of fungal diseases by allowing wind to pass through the foliage. 🏗️🌀
- Sun Exposure: Choose a spot that gets at least 6 hours of full sun per day. In warmer climates, some afternoon shade can help prevent the plants from overheating. ☀️🛡️
Essential Care and the “Blanching” Secret 💡
To get those perfectly white, sweet heads found in stores, you need to master a specific traditional technique called blanching.
- Consistent Watering: Cauliflower must never experience “drought stress.” If the soil dries out, the heads will become bitter and crumbly. Aim for at least 2.5 cm of water per week, ensuring the moisture penetrates deep into the root zone. 🚿🚫
- Mulching: Apply a layer of straw or dried leaves around the base of the plants. This keeps the roots cool, suppresses weeds, and maintains even soil moisture. 🌾🛡️
- The Blanching Process: When the white curd is about the size of a tennis ball, it needs protection from the sun, which can turn it yellow and bitter. 🎾
- The Method: Gently gather the large outer leaves and tie them over the head with soft twine or a rubber band. This keeps the curd in total darkness, ensuring it stays white and tender. 👔🛡️
- Pest Protection: Keep an eye out for cabbage worms and aphids. Using row covers early in the season is a simple, chemical-free way to keep pests from laying eggs on your crop. 🛡️🐛
Harvesting Your Success ✂️
Knowing exactly when to harvest is the final step to a perfect crop.
- Timing: Most varieties are ready 70 to 100 days after planting. The head should be 15 to 20 cm in diameter, firm, and compact. 📈
- The Technique: Use a sharp knife to cut the head off the main stem. Leave a few of the surrounding green leaves attached to protect the curd from bruising until you are ready to cook it. 🔪🥬
- Storage: Fresh cauliflower can be stored in the refrigerator for up to two weeks. If you have an abundant harvest, it can be blanched in boiling water and frozen for several months. ❄️🏺
Leave a Reply