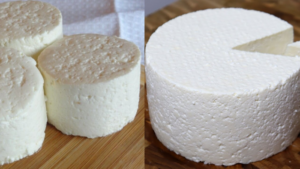
Making cheese at home sounds like a daunting task that requires specialized equipment and rare cultures, but this recipe proves otherwise. 🧀 Using just three basic ingredients from your fridge, you can create a fresh, creamy, and chemical-free cheese in your own kitchen. This “express” method relies on the natural acidity of lemon and the live cultures in yogurt to separate the milk into delicious curds, resulting in a healthy alternative to store-bought processed versions. 🥛🍋✨
The Three Essential Ingredients 📝
To get the best texture and flavor, the quality of your ingredients is the most important factor:
- 1 Liter of Full-Fat Milk: The higher the fat content, the creamier and more abundant your cheese will be. Avoid “Long Life” or ultra-pasteurized milk if possible, as it doesn’t curdle as effectively. Fresh whole milk is the gold standard. 🐄🍼
- 1 Natural Yogurt (approx. 125g): Plain, unsweetened yogurt adds a subtle tang and helps the fermentation process. It provides the “body” that makes the cheese smooth. 🥣
- Half a Lemon (Juiced): The acid in the lemon acts as the coagulant, causing the milk proteins to clump together. You can also use a tablespoon of white vinegar, but lemon provides a fresher taste. 🍋⚡
- Salt (optional): A pinch of sea salt to enhance the flavor once the curds have formed. 🧂
Step-by-Step Preparation 🛠️
- Heating the Milk: Pour the milk into a heavy-bottomed pot to ensure even heating. Heat it over medium-high heat, stirring occasionally to prevent the bottom from scorching. Bring it almost to a boil—look for small bubbles and steam ($85\text{–}90^{\circ}\text{C}$), but do not let it boil over. 🔥🥛
- The Coagulation Phase: Once the milk is hot, reduce the heat to low. Stir in the yogurt thoroughly until it is completely incorporated. Then, slowly pour in the lemon juice while stirring gently with a wooden spoon. You will almost instantly see the milk separate into white clumps (curds) and a yellowish liquid (whey). 🧪✨
- Resting: Turn off the heat and let the mixture sit undisturbed for about 10–15 minutes. This allows the curds to firm up and the chemical reaction to finish completely. ⏳
- Straining: Place a colander over a large bowl and line it with a piece of clean cheesecloth or a fine cotton kitchen towel. Carefully pour the mixture through. The whey will drain into the bowl, leaving the fresh cheese in the cloth. 🏺💧
- Seasoning and Pressing: While the cheese is still warm, stir in a little salt if desired. You can also add herbs like chives or black pepper. Gather the corners of the cloth and squeeze out the excess moisture. The more you squeeze, the firmer your cheese will be. ✋🧀
- Shaping and Chilling: Place the cloth-wrapped cheese into a small mold or a container with holes at the bottom. Put a weight on top (like a heavy jar) and refrigerate for at least 2–4 hours to allow it to set into a solid block. ❄️⚖️
Why Make Cheese at Home in 2026? 💡
In an era where we want to know exactly what is in our food, this recipe is a total win for your health and your wallet.
- No Preservatives: Unlike store-bought versions, this contains zero stabilizers, emulsifiers, or artificial additives. It is pure protein and calcium. 🛡️🚫
- Zero Waste: Don’t throw away the leftover yellowish liquid (the whey)! It is packed with protein and vitamins. You can use it in smoothies, use it to bake bread, or even use it as a nutrient-rich drink for your garden plants. ♻️🌿
- Cost-Effective: For the price of a single liter of milk, you get a gourmet-quality fresh cheese that would cost much more at a specialty deli. 💰✅
Leave a Reply