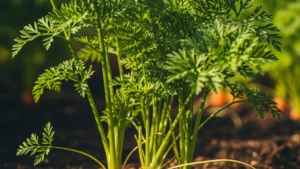
In 2026, the trend of “zero-waste gardening” has made it easier than ever to turn your kitchen into a productive nursery. 🥕 One of the most satisfying and simple projects for beginners is regrowing carrots from the parts you usually throw away. While it is a common misconception that a carrot top will grow a whole new orange taproot, this method is the perfect way to produce highly nutritious carrot greens and eventually harvest seeds for your next full crop. It’s a fun, educational, and sustainable way to expand your garden for $0. 📈✨🌱
Understanding the “Scrap” Method 📝
When you cut the top off a carrot, you are saving the “crown”—the part of the plant where the foliage emerges.
- The Biological Engine: The crown contains the concentrated energy needed to restart the plant’s growth. By giving it water and light, you trigger the dormant cells to produce new leaves and roots. 🔋
- The Harvest: What you are growing are carrot greens. These lacey leaves have a mild, earthy carrot flavor and are packed with Vitamin K, potassium, and antioxidants. They are excellent for pestos, salads, or garnishes. 🥗✨
- Seed Production: If you let these regrown tops mature and flower, they will produce hundreds of seeds that you can plant to grow actual full-sized carrots next season. 🌼🏺
Step 1: Preparing Your Carrot Tops 🛠️
The next time you are cooking, don’t toss the ends of your carrots into the compost bin.
- The Cut: Cut the top of the carrot, leaving about 2 cm of the orange root attached to the green stem area. ✂️📏
- Freshness Matters: Use carrots that still have a bit of green at the top if possible. Old, shriveled carrots from the back of the fridge have less energy to restart their growth. 🥕🔍
Step 2: The Water Germination Phase 💡
Before moving to soil, it is best to start the roots in a controlled environment.
- The Dish: Place your carrot tops in a shallow dish or saucer. 🏺
- The Water Level: Add just enough water to touch the bottom of the orange part. Do not submerge the entire top, as this will cause the crown to rot. 💧🚫
- Light and Heat: Place the dish on a bright windowsill. Within 4 to 7 days, you will see tiny bright green shoots emerging from the center and small white roots growing from the bottom. ☀️📈
Step 3: Transplanting to Soil 🏺🌿
Once the green shoots are about 5 cm tall and the roots are visible, it is time to move them to a more permanent home.
- The Container: You can use a traditional pot or even a recycled plastic container with drainage holes. 📦
- The Planting: Bury the orange part completely in loose, well-draining potting soil, leaving only the new green shoots above the surface. 🌿✨
- Spacing: If planting several, space them about 5–10 cm apart to give the foliage room to spread. 📏
Maintenance and Harvesting 🚿
- Watering: Keep the soil consistently moist. Carrot greens are delicate and will wilt quickly if the soil dries out completely. 🚿💧
- Sunlight: Carrots love the sun! Ensure they get at least 6 hours of light daily to keep the greens lush and flavorful. ☀️📊
- The Harvest: You can start snipping off the outer leaves once they reach 10–15 cm in height. This encourages the plant to produce more growth from the center. ✂️🔋
- Flowering: If you want to collect seeds, let the plant continue to grow until it produces a tall stalk with white, umbrella-shaped flowers (similar to Queen Anne’s Lace). Once the flower dries and turns brown, you can shake out the seeds for future planting. 🌼🏺
Why This is the Perfect 2026 Garden Project 🌍
Regrowing scraps is a powerful way to reduce food waste and connect with the lifecycle of your food. Even without a backyard, you can have a “living pantry” on your kitchen counter, providing fresh herbs and greens at a moment’s notice. 🏡✨
Leave a Reply