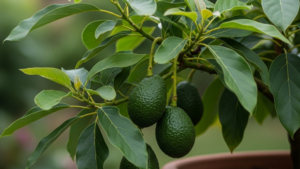
Growing an avocado tree (Persea americana) from a simple pit is one of the most rewarding experiments in the world of indoor gardening. 🥑 While it requires a good deal of patience, watching a giant seed crack open to reveal a vibrant green sprout is a true lesson in the resilience of nature. In 2026, avocado trees have become a symbol of sustainable home decor, providing lush, tropical foliage that can eventually grow into a majestic tree. Whether you are starting on your kitchen windowsill or in a backyard, this guide provides the biological roadmap for success. 📈✨🌿
Step 1: Preparing the Pit (The Toothpick Method) 📝
The most popular way to start is the water suspension method, which allows you to watch the roots develop in real-time.
- Cleaning: Carefully remove the pit from a ripe avocado without cutting it. Wash away any leftover fruit residue, as this can attract mold. 🥑🧽
- Orientation: This is the most critical part. The pit has a “top” (pointed end) and a “bottom” (flat end). Roots only grow from the bottom! 🔍⚓
- Suspension: Insert three or four toothpicks into the middle of the pit at a slight downward angle. Rest the toothpicks on the rim of a glass filled with water so that the bottom half of the pit is submerged. 🏺💧
- Water Maintenance: Change the water every 2 to 3 days to keep it oxygenated and free of bacteria. 🌬️🚿
Step 2: The Germination Phase 💡
Patience is key here. It can take anywhere from 2 to 8 weeks for the pit to show signs of life. ⏳
- The Crack: First, the outer brown skin will shrivel and peel. Then, the pit will develop a deep vertical crack. ⚡
- Root and Shoot: A tiny taproot will emerge from the bottom crack, followed shortly by a small green shoot emerging from the top. Do not move the plant or let the water level drop during this delicate time. 🌿📉
Step 3: Transplanting to Soil 🏺🌿
Once the stem is about 15 cm tall, it is time to move your avocado from water to its first pot.
- The “Pinch” Trick: Before planting, many professional gardeners cut the stem back by half (to about 7–8 cm). This encourages the plant to branch out and become bushier rather than growing as one thin, weak stalk. ✂️🔋
- The Pot: Choose a 25 cm diameter pot with excellent drainage. 🏺
- The Soil: Use a rich, loose potting mix. When planting, leave the top half of the pit exposed above the soil line. If you bury the whole pit, the base of the stem may rot. 🏺✨
Step 4: Sunlight and Temperature ☀️🌡️
Avocados are tropical plants that crave warmth and intense light.
- Solar Needs: Place your tree in the sunniest spot in your home. They need at least 6 to 8 hours of bright light daily. ☀️📊
- Warmth: They thrive in temperatures between $15^{\circ}\text{C}$ and $28^{\circ}\text{C}$. If you take your tree outside in the summer, bring it back indoors the moment temperatures drop toward $10^{\circ}\text{C}$. 📉❄️
Step 5: Essential Care and Maintenance 🚿🔋
- Watering: Avocados love frequent watering but hate “wet feet.” The soil should be kept moist but never saturated. If the leaves turn yellow, it’s a sign of overwatering; if they turn brown and shrivel, the plant is too dry. 🚿🚫
- Pinching for Shape: Every time the plant grows another 15 cm, pinch off the top two sets of leaves. This forces the tree to produce lateral branches, creating a lush, full appearance. 🌿✨
- Fertilizing: Once the tree is a year old, feed it with a balanced citrus or avocado fertilizer every month during the spring and summer. 🧪📈
The Reality of Home-Grown Fruit 🔍🥑
It is important to manage expectations: an avocado tree grown from a pit can take anywhere from 5 to 13 years to produce fruit, and the fruit may taste different from the parent avocado. However, as an ornamental houseplant, its large, glossy leaves and rapid growth make it a spectacular addition to any 2026 home garden. 🏡🌸✨
Leave a Reply