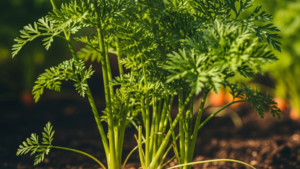
Practical guide to growing carrots easily using kitchen scraps for a successful vegetable garden. 🌱
Carrots are an essential vegetable: crunchy, sweet, and rich in nutrients. What many people don’t know is that carrots are not only easy to grow, but you can also use the peels and tops that are usually thrown away. If you’ve ever peeled a carrot and wondered what to do with the green top, you’re in luck! This small piece is your starting point for growing new carrots, even if you have no gardening experience.
This guide will explain the surprisingly simple method to grow carrots from kitchen scraps and maintain them easily in your garden, in pots, or on your windowsill. 🍅
Understanding What Can Grow from a Carrot Top
It is important to know that while it is impossible to regrow a full carrot from a piece, you can grow the tops and obtain seeds by letting them flower. These tops are edible and make a delicious addition to soups, pesto, and salads. Above all, you can use carrot tops as a starting point to germinate shoots, which will eventually allow you to harvest seeds and grow new carrots.
If you are looking for a fun and easy way to get into gardening using only food scraps, carrot tops are an excellent starting point.
Step 1: Save Your Carrot Tops
When cooking, instead of throwing away the top of the carrot (the end with the green stem), save it. Make sure it has at least 2.5 cm of thickness so it has enough energy for germination.
Ideally, use organic carrots. Many conventionally grown carrots are treated to prevent germination, so results may vary.
Step 2: Place in Water to Germinate
To start the regrowth process:
Fill a shallow dish or bowl with water. Place the carrot tops with the cut side facing down and the green end facing up. Keep the water level just high enough to touch the cut surface. Place the bowl on a sunny windowsill or in a bright location.
Change the water every two days to prevent mold and bacteria. After a few days, you will see green shoots appear on top and small roots forming below. 🌱
Step 3: Transfer to Soil
Once your carrot tops have developed roots and visible green shoots (usually after 7 to 10 days), they are ready to be planted in soil.
For container planting:
Choose a pot at least 8 to 10 inches deep. Use loose, well-draining potting soil. Plant the carrot top so that the green shoots are above the soil and the rest is buried.
For garden beds:
Loosen the soil to a depth of at least 25 cm. Incorporate compost to promote healthy growth. Space the tops about 7.5 cm apart and water gently. 🪴
Step 4: Provide Proper Care
From this stage, caring for the carrots is relatively simple:
Light: Carrots love sunlight. Aim for 6 to 8 hours of direct sunlight per day. Watering: Keep the soil evenly moist, but not waterlogged. Water regularly, especially in hot weather. 💧 Soil: Loose, sandy soil promotes straight and long root growth. Remove stones and debris to prevent deformed carrots. Fertilizer: Use a balanced organic fertilizer every few weeks. Avoid excess nitrogen, which encourages foliage growth at the expense of roots.
Although these carrot tops will not develop full roots, the leaves will continue to grow and, over time, the plant may bolt (flower). If you are patient, this will allow seed production, giving you the opportunity to grow real carrots from seeds next season.
Step 5: Harvest the Greens or Collect Seeds
Carrot tops are ready to harvest when they reach 15 cm or more. Use clean scissors to cut them just above the base, allowing the plant to continue growing.
If your plant produces flowers, let them mature and dry on the stem. You will then see small seeds forming in clusters; shake them gently to detach and save them for sowing.
These seeds can then be sown directly in the garden or in containers to grow real carrot roots — a complete cycle that starts with a simple kitchen scrap.
Bonus Tip: Companion Planting
Carrots grow well alongside other vegetables and aromatic herbs. Try pairing them with:
- Tomatoes (which provide some shade)
- Onions (help repel harmful insects)
- Parsley and lettuce (similar soil and water needs)
Avoid planting near dill or coriander, as these plants can compete for nutrients and slow down growth.
Final Thoughts
You don’t need a green thumb or even a packet of seeds to grow your own vegetables. With a simple carrot top, a sunny spot, and a little attention, you can enjoy fresh greens, harvest your own seeds, and eventually grow your own carrots.
This simple method allows you to adopt a sustainable, creative, and rewarding approach for your kitchen and garden. It is a perfect introduction to zero-waste gardening and an ideal activity for adults and children alike. Get started! You will be surprised at what a simple scrap can become. ✨
Leave a Reply