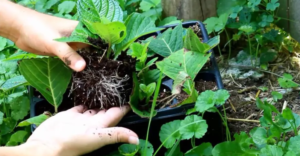
Hydrangeas are the crown jewels of the summer garden, but buying multiple mature plants can be expensive. Fortunately, hydrangeas are among the best candidates for propagation through cuttings. The secret to “100% success” lies in the timing, the selection of the stem, and creating a humid “mini-greenhouse” environment that encourages rapid root development before the cutting can dry out.
Why This Propagation Method Is So Effective
1. Clonal Consistency
When you propagate from a cutting, the new plant will be a perfect genetic clone of the parent. This ensures you get the exact same flower color and leaf shape that you already love in your garden.
2. Rapid Root Development
By using semi-hardwood cuttings (stems that are firm but still flexible), the plant is in its peak growing phase. This transition stage contains the highest concentration of natural growth hormones, making rooting much faster than with older wood. 📈🌱
3. Humidity Control
The biggest enemy of a new cutting is transpiration (water loss through leaves). This method uses a simple covering technique to keep humidity at 100%, allowing the stem to stay hydrated while it focuses all its energy on building a new root system. 🌡️🌬️
How to Successfully Propagate Your Hydrangeas
Step 1: Choosing the Right Stem
In late spring or early summer, look for a healthy branch that does not have a flower bud at the tip. A “blind” shoot has more energy available for rooting. ✂️
Step 2: Preparing the Cutting
- Cut a 10–15 cm segment of the stem just below a leaf node (the bump where leaves grow).
- Remove the lower leaves, leaving only the top pair.
- The Pro Secret: If the remaining leaves are very large, cut them in half horizontally. This reduces the surface area for water loss but still allows for photosynthesis. 🍃
Step 3: The Planting Process
- Dip the bottom of the stem in a little honey or aloe vera gel (natural rooting stimulants and antiseptics).
- Insert the cutting into a small pot filled with a mix of peat and perlite or light potting soil. 🏺
Step 4: The Mini-Greenhouse
Cover the pot with a clear plastic bag or a cut-off plastic bottle to trap moisture. Place the pot in a bright spot but away from direct sunlight, which could “cook” the cutting. 🛡️☀️
Step 5: Transplantation
In about 4–6 weeks, gently tug on the stem. If you feel resistance, roots have formed! You can then gradually acclimate the plant to the outside air before moving it to its permanent home.
Leave a Reply