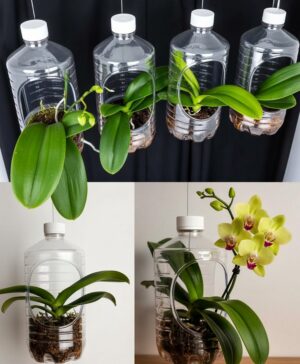
Wondering if you can propagate an orchid from a single leaf? We debunk the myths and show you the real way to grow new orchids using stem cuttings and keikis.
If you love orchids as much as I do, you have probably looked at a healthy, fallen leaf and wondered: “Can I grow a new plant from this?”
It is a tempting idea. After all, many popular houseplants—like succulents, Snake Plants, and African Violets—can miraculously sprout new roots from a single leaf. But do orchids play by the same rules?
I have been growing orchids for years, and the short answer is: No, a standalone leaf will not grow roots.
However, don’t lose hope! If that leaf is attached to a small piece of the stem, or if you find a baby offshoot (called a keiki), you have a very real chance at success. Here is everything you need to know about propagating orchids the right way.
Why You Can’t Grow Orchids from Just a Leaf
Unlike Pothos or Jade plants, orchids are biologically different. They do not have the ability to regenerate from a leaf alone.
Orchids grow from specialized structures responsible for storing energy and generating new growth:
- Rhizomes: found in sympodial orchids like Cattleyas and Dendrobiums.
- Monopodial Stems: found in orchids like Phalaenopsis.
If you see a video claiming to grow an orchid from a floating leaf, it is likely a myth. Successful propagation requires a node—a specific point on the stem where new growth emerges.
The Solution: Using Stem Cuttings or Keikis
While a leaf alone won’t work, you can propagate if you have the right material.
- A Stem Cutting: A leaf attached to a section of the stem that contains a dormant node.
- A Keiki: A baby orchid that naturally forms on the flower spike of a mature plant.
Step-by-Step Guide: How to Propagate Your Orchid
Ready to expand your orchid collection? Follow this 8-step process.
1. Identify Your Material
Look for a keiki (Hawaiian for “baby”) growing on your mother plant’s flower spike. If you see one, you are in luck! If not, look for a healthy leaf that is still attached to a stem segment containing a dormant node.
2. Sterilize Your Tools
Orchids are incredibly sensitive to bacteria and viruses. Before you make a single cut, sterilize your knife or scissors with rubbing alcohol or by holding the blade over a flame for a few seconds.
3. Make the Cut
- For Keikis: Wait until the baby plant has at least two leaves and roots that are at least 1 inch long.
- For Stem Cuttings: Ensure the cut includes the node intact. This is the “engine” for new growth.
4. Let it Callous
Never plant a fresh cut immediately. Fresh wounds are prone to rotting. Let your cutting sit in a dry area for a few hours so the cut end can dry over (callous).
5. Prepare the Perfect Soil Mix
Put down the standard potting soil! Orchids need air flow around their roots. Prepare a light, airy mixture using:
- Sphagnum moss
- Orchid bark chips
- Perlite or charcoal
6. Plant the Cutting
Nestle your cutting into the sphagnum moss. Ensure the node is touching the medium. If you are planting a keiki, gently place its roots in the moss, but do not bury them too deep.
7. Create a Greenhouse Effect
Orchids crave humidity. To help them root, place the pot in a warm spot (70–80°F / 21–27°C) with bright, indirect light.
- Pro Tip: Cover the pot with a clear plastic bag or a humidity dome to lock in moisture.
8. Watering & Patience
Mist the moss lightly to keep it damp, but never soggy. Now, the hardest part: patience. Roots can take several weeks or even months to develop.
Caring for Your Baby Orchid
Once roots are established, your new plant needs specific care to reach maturity.
- Humidity: Aim for 50–70%. If your home is dry, use a humidity tray.
- Fertilizer: Use a diluted orchid fertilizer every two weeks to fuel growth.
- Repotting: When roots reach 2–3 inches long, move the plant to a slightly larger pot with fresh orchid bark.
Troubleshooting Common Issues
- Leaves Turning Yellow: Usually a sign of overwatering or too much direct sun. Move to a shadier spot and reduce misting.
- No Roots Forming: The air might be too dry. Increase humidity or apply a small amount of diluted rooting hormone.
- Rotting Cutting: Caused by too much moisture and poor airflow. Let the cutting dry out longer next time and ensure the moss isn’t soaking wet.
Leave a Reply