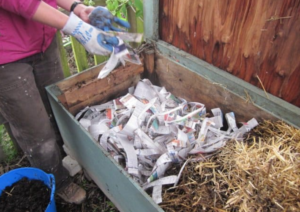
How to build a homemade vermicomposter. 🌱
Vermicomposting (composting with worms) is one of the best ways to recycle kitchen scraps and get rich, nutrient-dense fertilizer for your garden. It’s fast, odor-free (when done correctly), and perfect even for small spaces like apartments or balconies.
Here’s a simple, cheap, and effective way to build your own vermicomposter at home.
Materials You Will Need:
- Two plastic storage bins with lids (same size, about 40–60 liters)
- A drill (to make holes)
- Shredded newspaper or cardboard
- A handful of garden soil
- Red wigglers (Eisenia fetida) – about 500–1000 worms to start
- Kitchen scraps (fruit and vegetable peels, coffee grounds, tea bags, etc.)
Step-by-Step Instructions:
- Prepare the bins Take one bin and drill many small holes (about 3–5 mm) in the bottom for drainage and in the lid for ventilation. The second bin will serve as a tray to collect any liquid (worm tea).
- Create the bedding Shred newspaper or cardboard into strips and moisten them (like a wrung-out sponge). Add a handful of garden soil (for grit and microorganisms). Mix everything well and place it in the first bin (about 10–15 cm deep).
- Add the worms Place your red wigglers on top of the bedding. Let them settle for a day or two before adding food.
- Start feeding Bury small amounts of kitchen scraps in different spots in the bedding. Avoid meat, dairy, citrus in large quantities, and spicy foods at the beginning.
- Maintain the system Keep the bin in a cool, dark place (15–25°C is ideal). Check moisture regularly — the bedding should feel like a damp sponge. Add more shredded paper if it gets too wet.
Harvesting the Vermicompost
After 2–3 months, when the top layer looks like rich, dark soil, you can harvest:
- Move the bin to one side and add fresh bedding + food to the empty side.
- The worms will migrate to the new food over a couple of weeks.
- Collect the finished vermicompost from the old side.
Benefits of Vermicomposting
- Produces high-quality fertilizer full of nutrients and beneficial microbes
- Reduces household waste significantly
- Creates “worm tea” – a powerful liquid fertilizer
- Almost odor-free and very clean when managed properly
Conclusion
Building a homemade vermicomposter is easy, inexpensive, and incredibly rewarding. In just a few months, you’ll turn kitchen waste into black gold for your plants.
Start small, be patient with the worms, and soon you’ll have one of the best natural fertilizers for your garden! 🪱✨
Leave a Reply