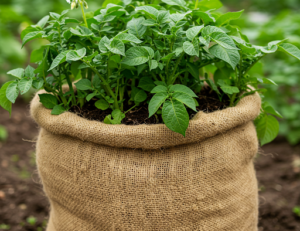
Sweet potatoes (Ipomoea batatas) are nutritional powerhouses that are surprisingly easy to grow, provided you understand their tropical nature. 🍠 Unlike regular potatoes, which are grown by planting “eyes” from a tuber, sweet potatoes are grown from “slips”—small shoots that grow out of a mature tuber. In 2026, home cultivation of these heat-loving vines has surged in popularity because they are highly productive, drought-tolerant, and produce beautiful ornamental foliage. 📈✨🌿
1. Starting the “Slips” (The Sprouting Secret) 📝
The most important thing to know is that you should not plant a whole sweet potato directly in the ground. You must first generate “slips.”
- The Jar Method: Take a healthy, organic sweet potato and suspend it in a jar of water using toothpicks, so that half of the tuber is submerged. Place it on a warm, sunny windowsill. 🏺💧
- The Soil Method: Alternatively, lay the tuber horizontally in a tray of moist potting mix and cover it halfway with soil. Keep it warm (around $25\text{–}27^{\circ}\text{C}$). ☀️🌡️
- The Growth: Within a few weeks, several green shoots will emerge from the tuber. These are your future plants! 🌿✨
2. Rooting and Preparing for Planting 🛠️
Once the shoots (slips) reach about 10–15 cm in length, it is time to prepare them for the garden.
- Separation: Gently snap the slips off the mother tuber. ✂️
- Rooting in Water: Place the bottom half of the slips in a glass of water. Within a few days, you will see a dense network of white roots forming. 🏺🌬️
- The Result: Once the roots are 2–3 cm long, they are officially ready to be transplanted into the soil. 📈💪
3. Soil Preparation and Timing 🏺
Sweet potatoes are children of the sun and hate the cold. ☀️🚫❄️
- The Heat Factor: Never plant sweet potatoes outside until the soil temperature has reached at least $18^{\circ}\text{C}$ ($65^{\circ}\text{F}$). If the soil is too cold, the roots will simply sit and rot. 🌡️
- Loose, Sandy Soil: These tubers need room to expand. They thrive in loose, sandy, or loamy soil. If your soil is heavy clay, the sweet potatoes will be small and misshapen. 🏺✨
- Mounding (Ridges): Professional growers always plant in “ridges” or mounds. Creating a raised mound of soil (about 20-30 cm high) ensures excellent drainage and allows the soil to stay warmer than the surrounding flat ground. 🏗️📐
4. Strategic Maintenance for Maximum Yield 💡
- Sunlight is Non-Negotiable: Sweet potatoes need at least 8 hours of full sun daily. The vines act as solar panels, converting sunlight into the sugars that fill the tubers. ☀️🔋
- Watering: Keep the soil consistently moist for the first month while the plants establish themselves. Once established, they are quite drought-tolerant, but regular deep watering will lead to a much larger harvest. 🚿💧
- Fertilizer Caution: Avoid fertilizers high in Nitrogen. Too much nitrogen will give you a massive forest of beautiful green vines but tiny, thin tubers. Use a fertilizer high in Potassium and Phosphorus to encourage tuber growth. 🧪🚫🌿
5. Harvesting and the Essential Curing Process ✂️🏺
Depending on the variety, sweet potatoes take 90 to 120 days to reach maturity. 🔍
- The Harvest: Dig them up carefully before the first frost hits. Frost can damage the tubers even underground. Use a garden fork and start digging from the outside of the mound to avoid piercing the delicate skins. 🍂
- The Curing Secret: Freshly dug sweet potatoes aren’t very sweet! 🚫🍯 To develop their sugars and toughen the skin for storage, you must “cure” them. Place them in a warm ($27\text{–}30^{\circ}\text{C}$), humid spot for 7 to 10 days. 🌡️🌬️
- Storage: After curing, store them in a cool, dark place (but never the refrigerator!). This process ensures they stay delicious and firm for up to 6 months. 🏺❄️
Leave a Reply