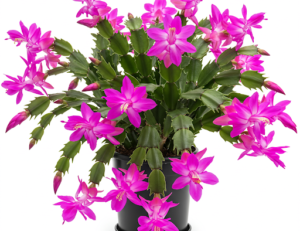
Why spend money at the garden center when your current Christmas Cactus (Schlumbergera) is essentially a living factory for new plants? 🌵 In 2026, the trend of “sharing the green” has made propagation one of the most popular gardening skills. Because these plants are epiphytic succulents, they possess an incredible biological ability to regenerate an entire root system from just a few leaf segments. By following this simple guide, you can create dozens of new plants to fill your home or give away as perfect, sustainable gifts. 🌸✨🎁
Why Propagation is Better Than Buying 📝
When you propagate your own plants, you aren’t just saving money; you are ensuring the health of the next generation.
- Genetic Consistency: The new plants will be exact clones of the mother plant. If you love the specific shade of pink or red of your current cactus, propagation guarantees you get that exact same color every time. 🧬✨
- Acclimatization: Cuttings taken from a plant already living in your home are already adapted to your specific humidity and light levels, making them much hardier than plants “spoiled” in a commercial greenhouse. 🏠🛡️
- Zero Plastic Waste: No new plastic pots, no transportation emissions—just pure, green growth. ♻️🌍
Step 1: Selecting the Perfect Cutting ✂️
Success starts with choosing the right “donor” branch from your Christmas Cactus.
- The Rule of Three: Look for a healthy, vibrant green stem and count back 2 or 3 segments from the tip. Cuttings with at least two segments have enough stored energy (sugars) to survive the rooting process without a mother plant. 🌿📈
- The “Twist” Technique: Don’t use scissors if you can avoid it! Gently grasp the stem and twist the segment off at the joint. A clean break at the natural “node” heals much faster than a jagged cut and reduces the risk of infection. 🔪🚫✨
- Timing: The best time to take cuttings is in the spring, right after the plant has finished its winter blooming cycle and enters its active growth phase. 🌸🔋
Step 2: The Essential “Callousing” Phase 💡
This is the step most beginners skip, and it’s the #1 reason cuttings rot.
- Air Dry: Place your cuttings on a paper towel in a dry, shaded spot for 24 to 48 hours. ⏳🌬️
- The Biological Shield: During this time, the “wound” where you twisted the segment will dry out and form a callous (a thin, skin-like layer). This barrier prevents soil bacteria and fungi from entering the stem and causing it to turn into mush once planted. 🛡️🦠
Step 3: Two Methods for Rooting 🛠️🏺
You can choose the method that fits your style, but both work exceptionally well for Schlumbergera.
Method A: The Soil Start (Recommended for Longevity)
- Prepare a small pot with a mix of 50% potting soil and 50% sand or perlite. 🏺🏜️
- Insert the calloused end about 1 cm deep into the soil.
- Water sparingly—just enough to keep the soil slightly damp. Within 3 to 4 weeks, the cutting will resist a gentle tug, meaning roots have formed. ⚓🌱
Method B: The Water Jumpstart (Recommended for Speed)
- Place the cutting in a small glass with just enough water to cover the bottom half of the lowest segment. 🏺💧
- Change the water every 2 days to keep it oxygenated. 🌬️🚿
- Once the roots are 2 cm long, transplant the cutting immediately into the soil. Don’t wait too long, or the “water roots” will have a hard time adjusting to the dry earth. 📈🧪
Step 4: Maintenance for Baby Cacti 🚿✨
- Light: Keep your new “babies” in bright, indirect light. They are delicate and can easily be “cooked” by direct sunlight while they are building their root systems. ☀️🛡️
- Humidity: If your home is dry, place a clear plastic bag over the pot for the first week to create a mini-greenhouse effect. This prevents moisture loss through the segments. 🌬️💧
- First Bloom: Don’t be discouraged if your new plant doesn’t bloom in its first year. It is focusing all its energy on building a strong root foundation and a bushy shape. By the second year, it will be ready to put on a spectacular show! 🌸✨🔋
Leave a Reply