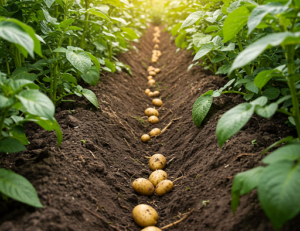
Growing potatoes (Solanum tuberosum) is one of the most satisfying experiences for a home gardener, but to achieve a truly massive yield, you need to understand the biology of the tuber. 🥔 Whether you are growing in a large garden bed or a simple grow bag, these six professional secrets will help you produce large, healthy, and incredibly tasty potatoes while avoiding common diseases. 🥗✨🌱
1. Start with Quality Seed Potatoes 📝
Not all potatoes are created equal. Many people try to plant potatoes bought from the grocery store, but these are often treated with growth inhibitors to prevent them from sprouting on the shelf. 🚫 For the best results, always use “certified seed potatoes.” These are guaranteed to be disease-free and are specifically selected for their high yield potential. If you do use organic store-bought potatoes, make sure they have visible, healthy “eyes” (the small buds) that are ready to sprout. 🌿🔍
2. The Power of “Chitting” 🛠️
“Chitting” is the process of pre-sprouting your potatoes before they ever touch the soil. 🕒 About 4 weeks before planting, place your seed potatoes in an egg carton or a shallow tray with the “eyes” facing upward. Keep them in a cool, bright room (but out of direct sunlight). This encourages the growth of short, sturdy green sprouts. Chitting gives the plant a massive “head start” once it hits the ground, leading to an earlier harvest and a more resilient plant. 📈💪
3. Soil Texture and pH Management 🧪
Potatoes are tubers that need space to expand. If your soil is heavy clay or full of rocks, the potatoes will be small and misshapen. 🏺 The ideal soil is loose, well-aerated, and enriched with plenty of organic matter like aged compost. Furthermore, potatoes prefer slightly acidic soil (pH 5.0 to 6.0). Avoid adding lime or fresh manure directly before planting, as this can encourage “potato scab,” a fungal disease that creates unsightly corky patches on the skin. 🛡️✨
4. Master the “Hilling” Technique 🏗️
This is arguably the most important physical gesture in potato gardening. As the green stems grow to about 20 cm tall, you must pile soil or mulch around the base of the plant, covering the bottom half of the stem. 🏗️ You should repeat this process 2 or 3 times as the plant grows. This “hilling” serves two purposes: it creates more underground space for tubers to form along the buried stem, and it protects the developing potatoes from sunlight. If a potato is exposed to light, it turns green and produces solanine, a toxic substance that makes the potato bitter and dangerous to eat. ☀️🚫🤢
5. Consistent and Strategic Watering 🚿
Potatoes need a steady supply of moisture, but their needs change throughout the season. The most critical time for watering is when the plant begins to flower. 🌸 This is the biological signal that the plant is actively “bulbing” or forming tubers underground. If the soil dries out during this phase, the harvest will be tiny. Aim for deep watering at the base of the plant once or twice a week rather than light daily sprinkling. However, stop watering once the foliage begins to turn yellow and die back to prevent rot. 💧✅
6. Harvesting and the Curing Process 🏺
Patience is key to a long-lasting harvest. While you can harvest “new potatoes” early, for a full crop, wait until the foliage has completely died back and withered. 🍂 After digging them up carefully with a garden fork, do not wash them immediately. Let the potatoes sit in a dry, dark, and well-ventilated area for 5 to 10 days to “cure.” This allows the skin to thicken and toughen, which is essential if you want to store your potatoes for several months throughout the winter. 🏺❄️
Leave a Reply